By Andrea Swedberg // Photographs by Lara Agnew
–
When grade school let out for the summer, my dad would pick my brother and me up in our sunny yellow Ford F250. We’d go home, grab our stuff, and head straight to the lake. On the shores of Baylis Cove on Clear Lake is where my grandparents retired—a homestead of sorts that my great-grandfather staked out in the early 1920s. An amazing little oasis, really, that to this day I feel very fortunate to have had in my life. It was so much more than just a place. It was a portal to many worlds of adventure, creativity, and spirituality. Water (and summer) does that to a child’s developing mind and soul—it nurtures beyond imagination!
That was 1985.
Now that I am forty-something, I realize nostalgia is just that: nostalgia. But if given the chance, I’d go back for those long summer days, talking on the pier with my grandpa, waterskiing sun up to sun down, sleeping under our sprawling fig tree every night, staring at the stars and listening to the lake’s waves lap upon the pebble shore until my eyes … just … shut. I’d also relive the shady-porch sessions of creating a summer token that I could wear—like a badge of honor—all year long, reminding me of my time at the lake.
An innumerable amount of DIY crafts existed in the 1970s and ’80s that didn’t take long to make. I’m willing to bet a bunch of ladies (and probably some men) would agree that a few of these rainbow-embellished projects are worth a redo, now that we have kids in our lives. Because, let’s be honest, as a parent it requires discipline to step away from the rushy-rush of life and just sit down with our little ones and create. It’s all about that one-on-one time together, the checking in with one another, and the listening to our child’s latest joke or what seems like a never-ending story. It’s in these moments that we, as adults, can also learn from them. And it reminds us that adventure’s hidden portals can exist anywhere, even in crafts.
That’s why there are the DIY crafts like the mystery braid; or the East Coast harbinger of summer, the sailor’s knot bracelet; or the quite fashionable way to represent your youth soccer team, the ribbon braid barrette. With a strand of leather or other sturdy material, your young Nellie Charlie needs only a place to chill out and just weave or knot.
So, in the spirit of living in the past, yet looking forward to the future (wheels turning in my head with ideas and with an overflowing craft-basket of potential materials), it’s time to climb upon Falkor’s back, glide through the universe, and head toward this season’s renditions of throwback DIY crafts. Below are instructions for two the-trails-are-muddy-and-the snow’s-no-good kid-approved crafts that you can help create with the young minds in your world.
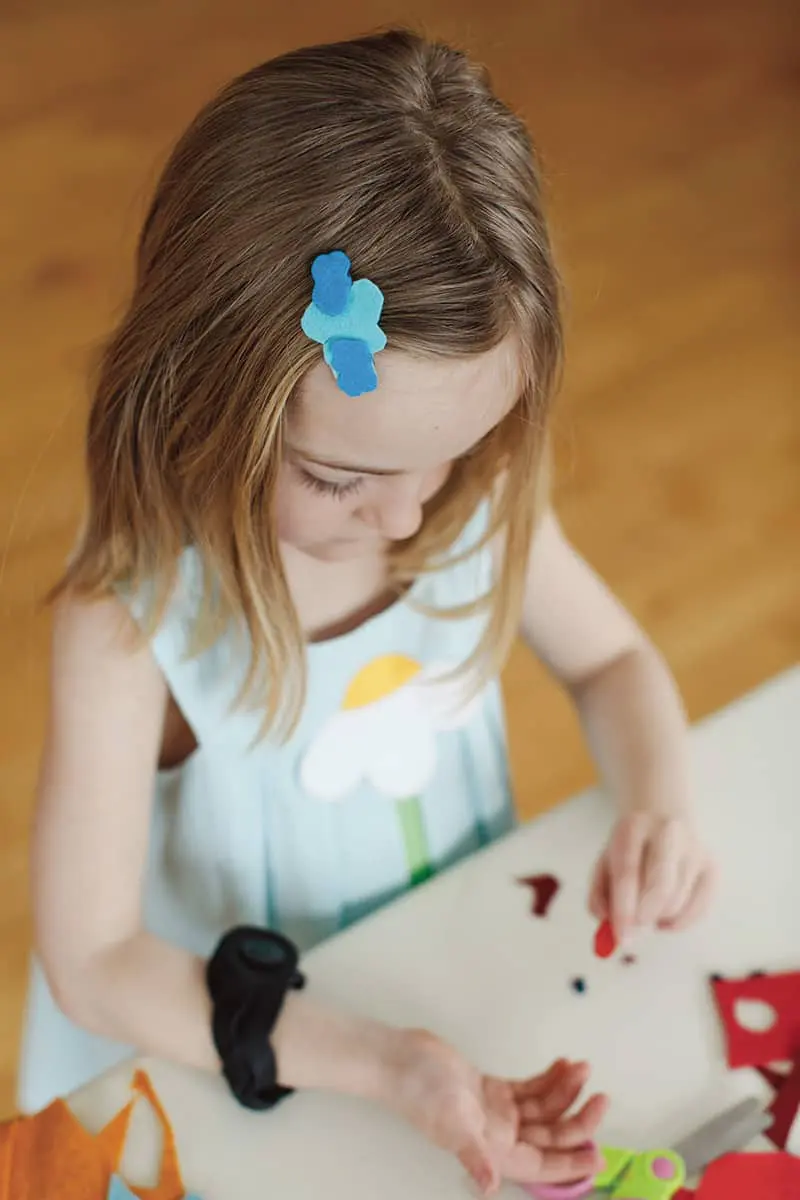
felt hair clips
For ages 3 and up, accompanied by an adult
—
When my daughter Piia was three years old, we had fun creating our own version of a decorated barrette. Piia would come up with the design and I would carry out the final steps. While our original designs had me hand-sewing tiny bits of felt together, I eventually changed my ways and used the crafter’s favorite tool—the HOT GLUE GUN!!
—
materials
Snap hair clips (Goody brand preferred)
Colored felt sheets
Scissors
Hot glue gun
Needle, thread, and small buttons (optional)
—
instructions
Gather supplies and plug in the hot glue gun.
To make the backing for clip: Open clip, insert one color of felt. Close clip.
Trim felt, using the clip as guide and leaving a tiny bit of an edge (for gluing top felt to bottom felt). Leave felt in clip, and clip closed.
To make the top of the clip: Lay the clip (with the bottom-felt still closed inside), top side down on another felt piece. Trim felt around the entire clip, using the bottom-felt edge as guide.
Hot glue the edges and center of one side of the top piece of felt. With top-felt’s hot glue side facing up, place closed clip (with bottom-felt piece closed inside) onto glued top piece. Make sure both top and bottom felts are secured by glue to the edges. While glue is still warm, gently squeeze felt edges and center together to ensure they connect. Trim edges with scissors for a clean finish.
To decorate the clip: Cut out felt shapes in other colors. Hot glue your design to the top piece of felt. Optionally, use needle and thread to add designs or buttons to the top piece of felt before attaching it to the bottom. (Search the web or Pinterest for various design ideas.)
Once cooled, the clip is ready to doll up your favorite girl’s hair!
mystery braid
For ages 8 and up,
accompanied by an adult
—
You can make this craft into a bracelet, belt, or keychain, using different lengths of leather. The bracelet option makes a not-so-dirty-and-stinky (after continued wear) alternative to the old school sailor’s knot bracelet.
—
materials
Strip of leather, pleather, or other vegan material, 1” wide by 14-18” long (available at craft stores or online)
Needle, thread, and button
Scissors
Sharp pocket knife
Pen
Ruler
—
instructions
On the backside of your leather, 1/2” in from both the top and bottom, make two evenly spaced dots, dividing the strip into thirds. Using your ruler and pen, connect the top and bottom dots with straight lines.
Start a slit with the pocketknife on each line until it’s big enough to cut with scissors. DO NOT cut farther than the dots. The material must remain whole, with three strips lining the center.
Number the strips 1, 2, and 3. Mark the back of strip 1 and 3 with a simple pattern, so they can be distinguished from one another while braiding.
(Optional)
Start your braid by placing strip 1 over top of 2 from left to right. Place 3 over top of 1 from right to left. Place 2 over top of 3 from left to right. Take the bottom of braid and pass it through the back of strip 2 and 1, from left to right, pulling it all the way through and down. (At this point, you’ll have a braid at the top and a mess at the bottom. Don’t worry about the mess!)
Next, pass 1 over 2. Pass 3 over 1. Pass 2 over 3. Take the bottom of braid and pass it through the back of 2 and 1, from right to left, pulling it all the way through and down (same as before). Repeat the braid pattern from the beginning, until you reach the bottom.
Adjust the braid so that it is evenly distributed over the length of the strip.
To make a bracelet, use your pocketknife to cut a small slit on one end of the braid, just enough to allow a button to pass through.
On the top side of the opposite end, hand-sew your button. Put the braid around your wrist, pass button through slit. Boom, done!
* Directions adapted from: fabdiy.com/diy-perfect-magic-braid/